Fullscreen components
All components in Timecode Expert can be visualized in seperate windows, and in fullscreen. You can also specify a component to be openened in fullscreen at the boot of the application. In this manual, you will learn how to do this.
We start with a project containing a SMPTE receiver, connected to a MIDI sender.

When you click the "expand" icon at the bottom right of the Receiver, a seperate window showing the name and the clock of the SMPTE receiver is shown.

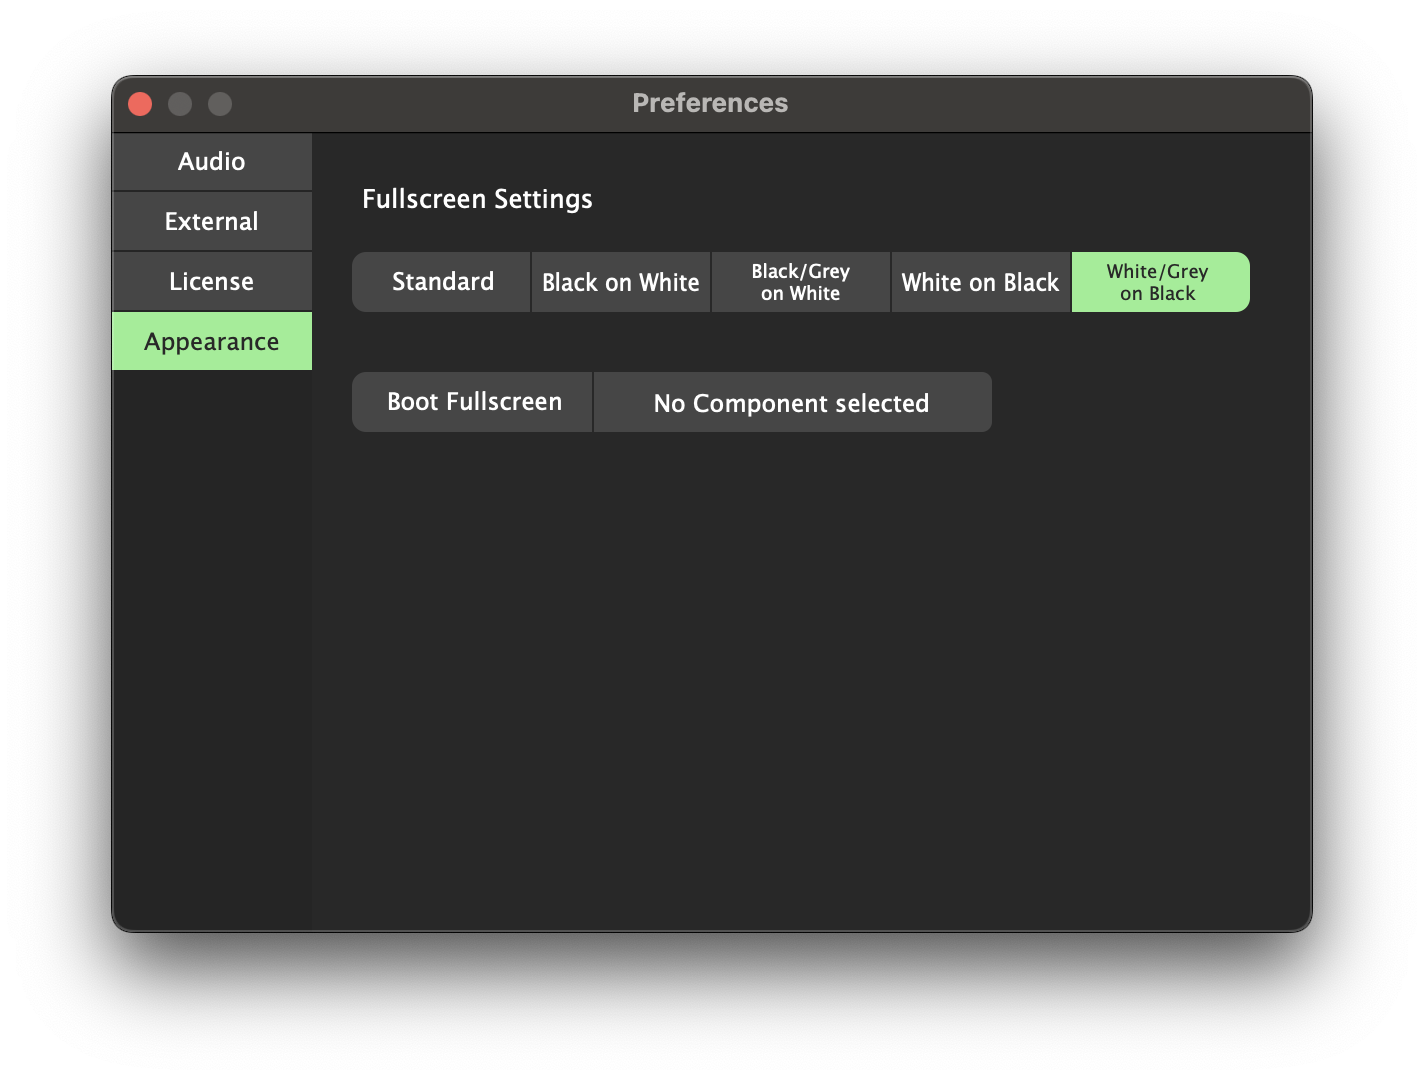
You can configure the color scheme of the seperate windows, by clicking [Options] -> [Preferences] -> [Appearance]. You can choose between the standard color scheme, and 4 higher contrast options.

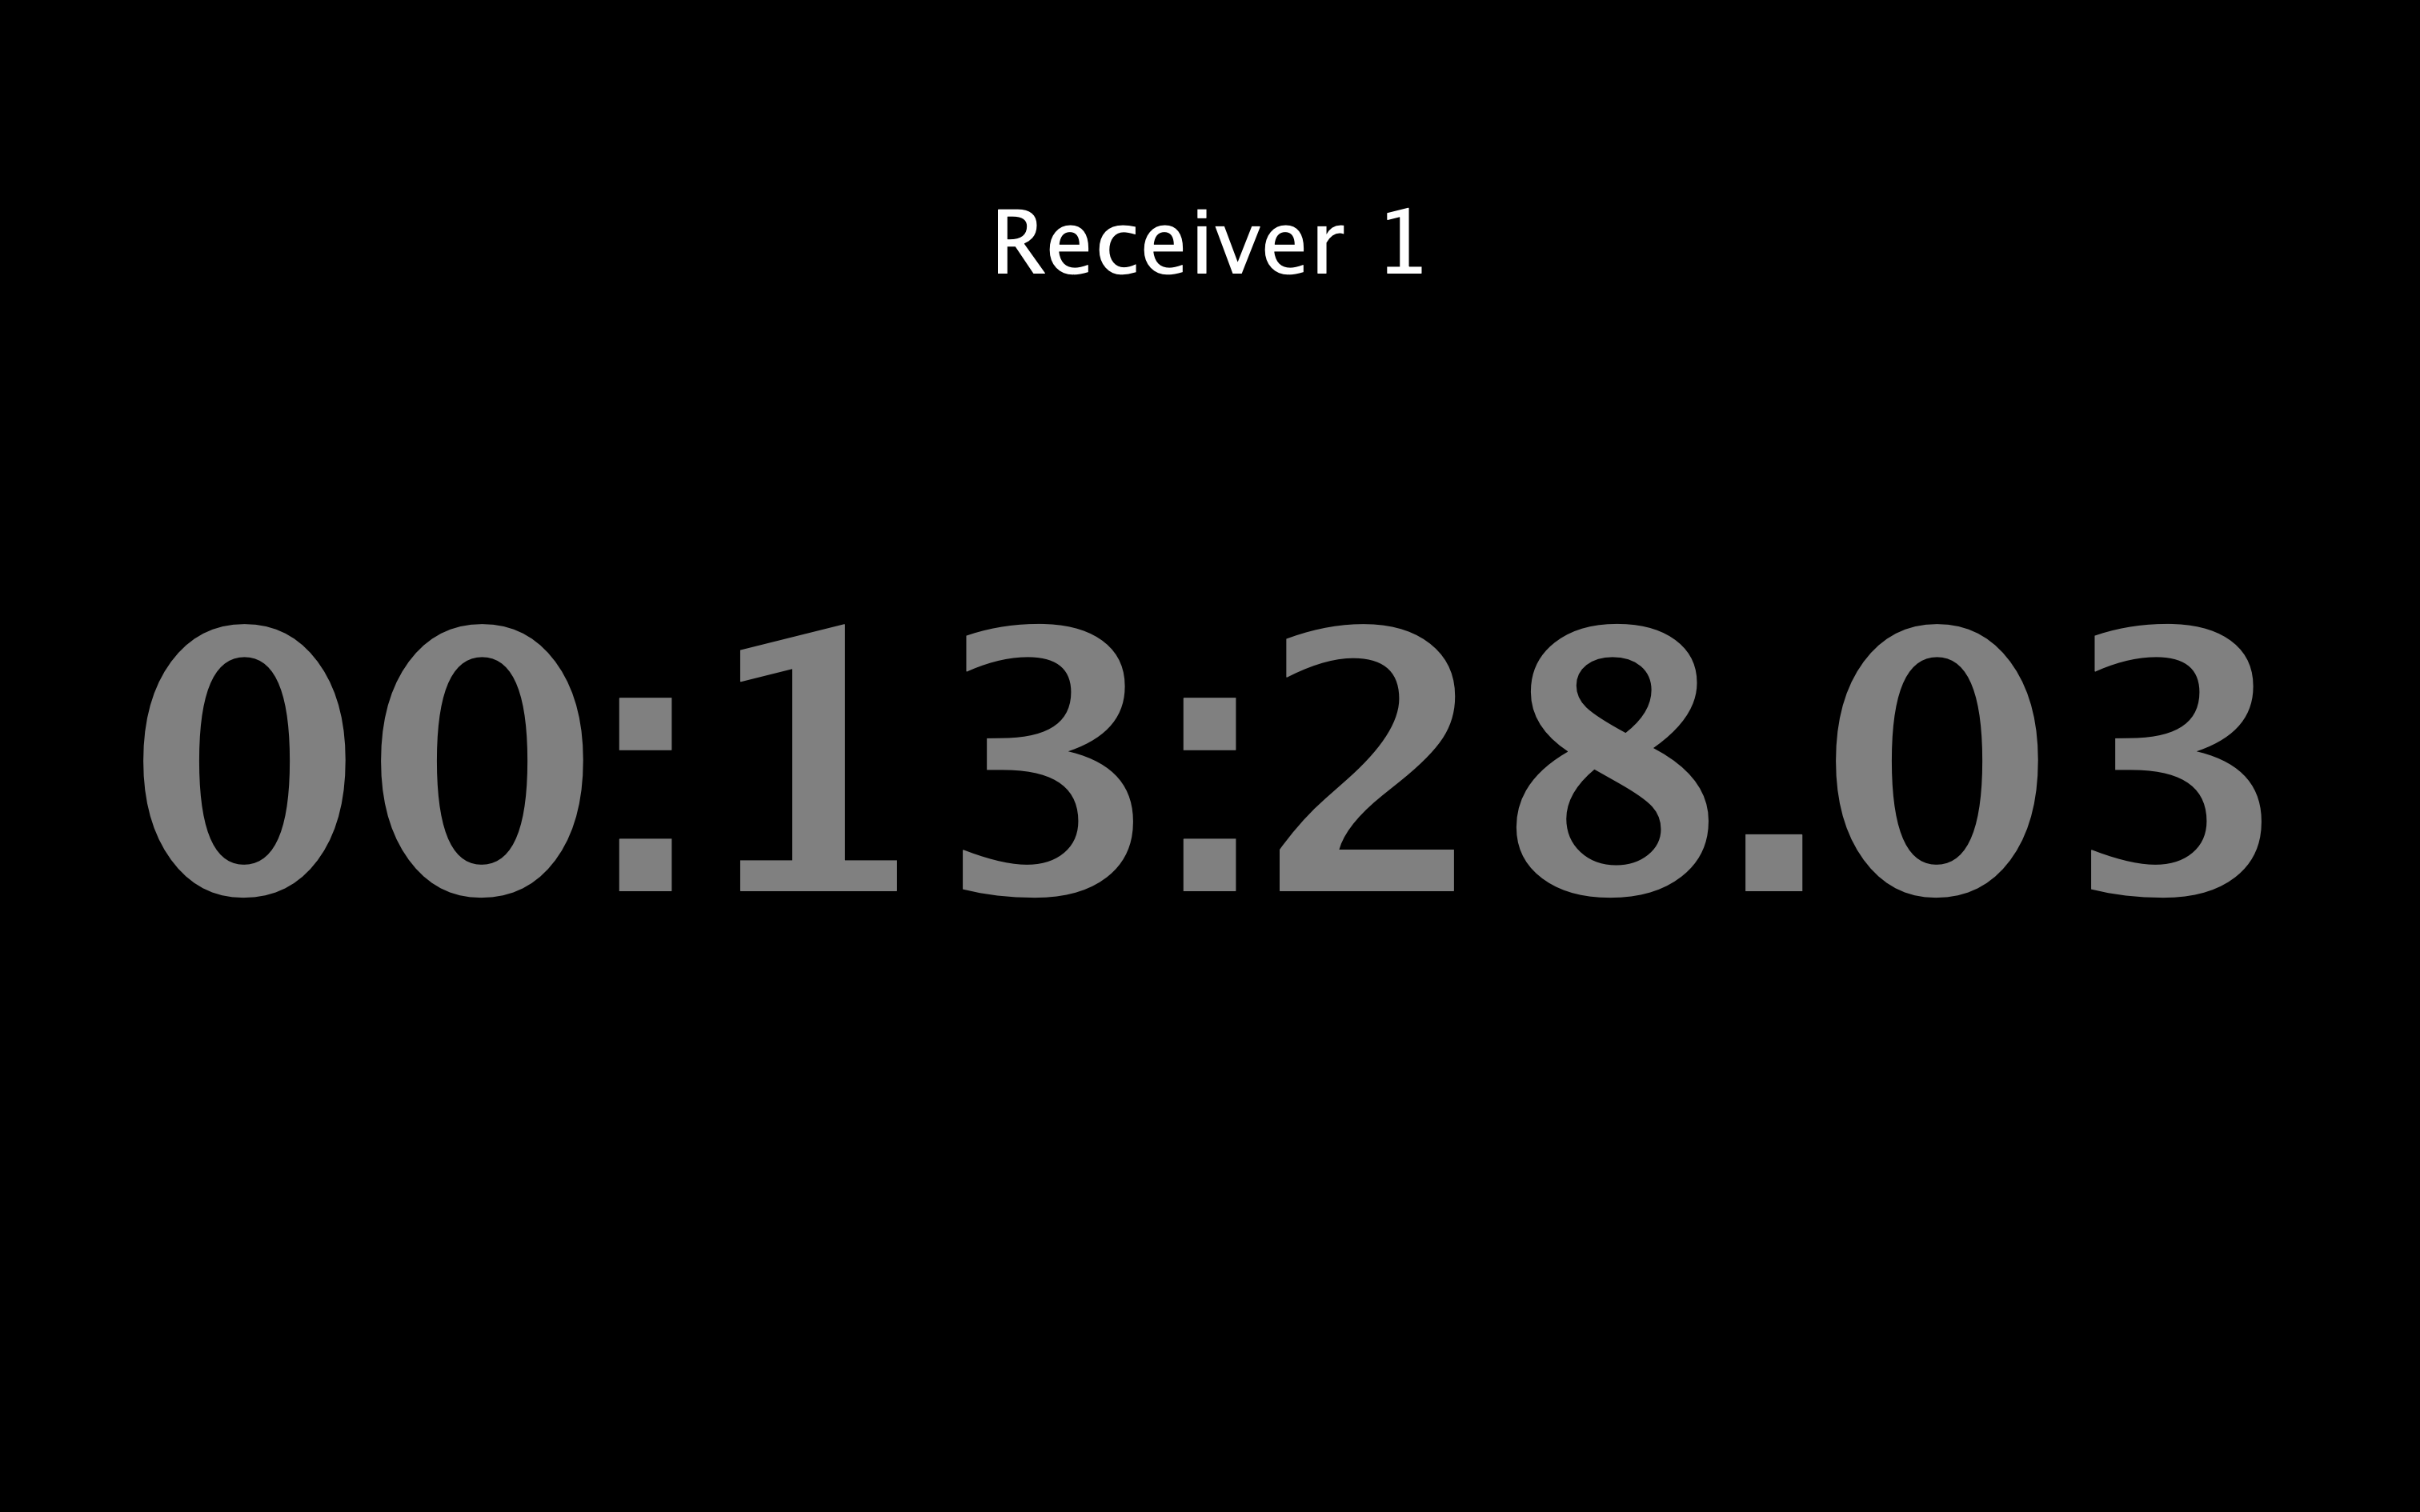
We pick the "White/Grey on Black" option, where the background is black, and the clock white while playing, and grey while waiting.
The colors of the seperate window changes immediately.

Timecode Expert can be configured to boot into displaying a fullscreen window. This can be handy if you are running a machine dedicated to displaying and or converting timecode, and you have configured Timecode Expert to be launched at boot.
We click [Options] -> [Preferences] -> [Appearance] again, and enable the [Boot Fullscreen] button and use the selector next to it to select the component to be displayed in fullscreen at boot.

When we save the project, and reboot Timecode Expert, "Receiver 1" is shown in fullscreen at boot.